
How to grant us Seller Central access
This guide walks you through inviting your Karos Labs account manager to your Amazon Seller Central account, completing Amazon's secondary-user verification, and setting the right permissions. You stay the account owner the whole time, and you can change or remove access in one click whenever you want.
Use these exact details when you add the user. Steps 6 onward show real Seller Central screens; the earlier invite steps are shown as on-brand illustrations with our details filled in. Amazon's exact layout may change from time to time.
Sign in as an Admin
Log in to sellercentral.amazon.com using an account with Admin permissions. Only an Admin can add new users and set permissions, so if you are not the account owner, ask whoever is.
Open Settings, then User Permissions
In the top-right corner, click the Settings gear, then choose User Permissions from the menu.
Add the new user and send the invite
Find the Add a New Seller Central User section. Enter the name and email exactly as shown, then click Invite.
Ben accepts the invitation
Amazon emails an invitation to ben@karoslabs.com. We accept it from our side, usually within a few hours. Nothing else is needed from you for this step.
Ben signs in to begin setup
After accepting, Ben signs in to your Seller Central account as a secondary user. Amazon then asks the new user to complete a short identity verification before any permissions take effect. We handle this on our end.
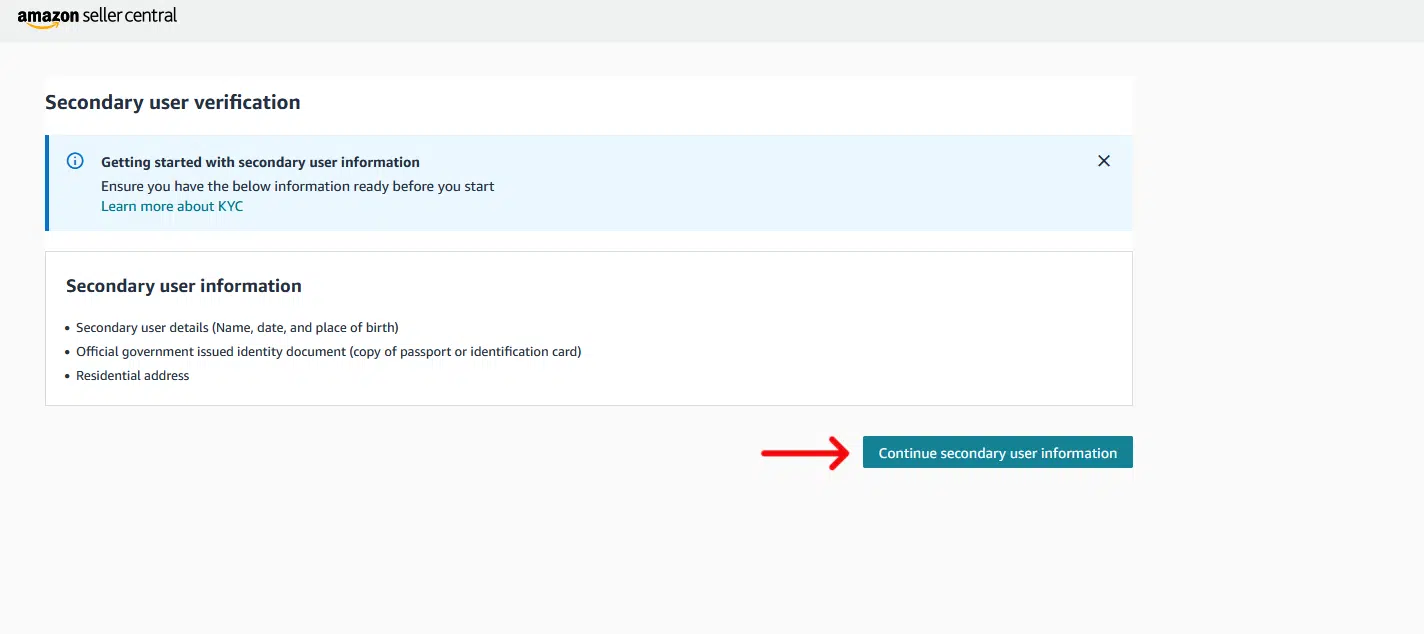
Secondary user verification
Amazon requires every new secondary user to verify their identity. The first screen lists what is needed (name and date of birth, a government-issued ID, and a residential address). We provide ours, then click Continue secondary user information.
Seller Central · Secondary user verification
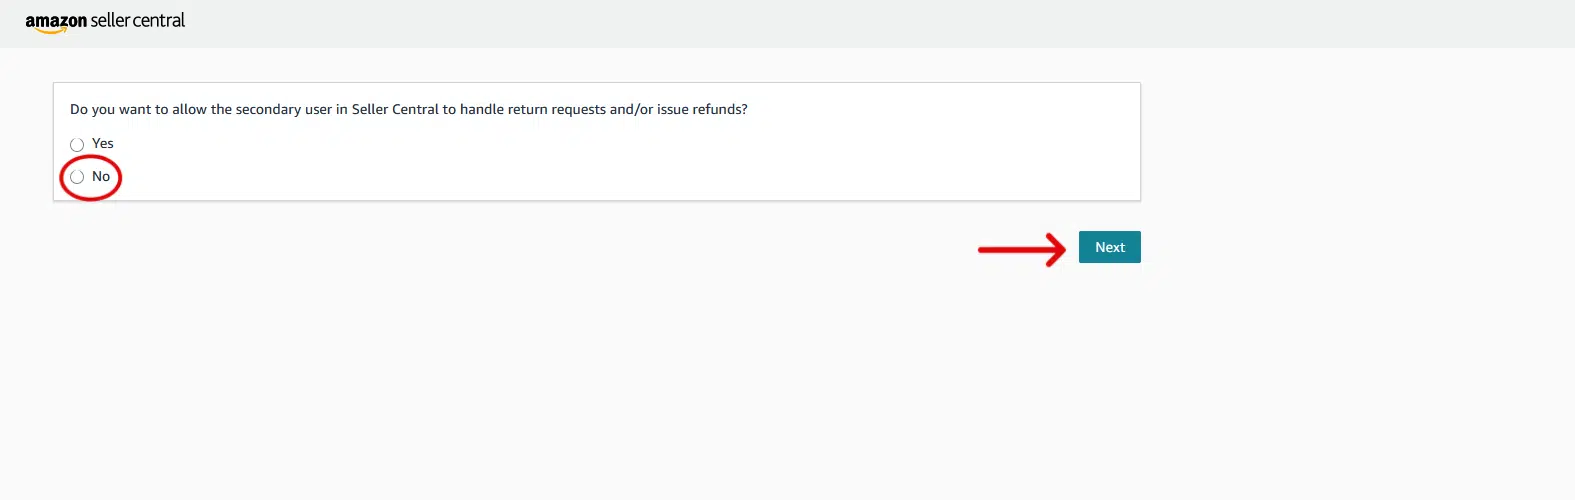
Set returns and refunds handling
Amazon asks whether the secondary user should handle return requests and issue refunds. For an account manager this is usually set to No unless you specifically want us managing refunds. Select your choice and click Next.
Seller Central · Returns and refunds
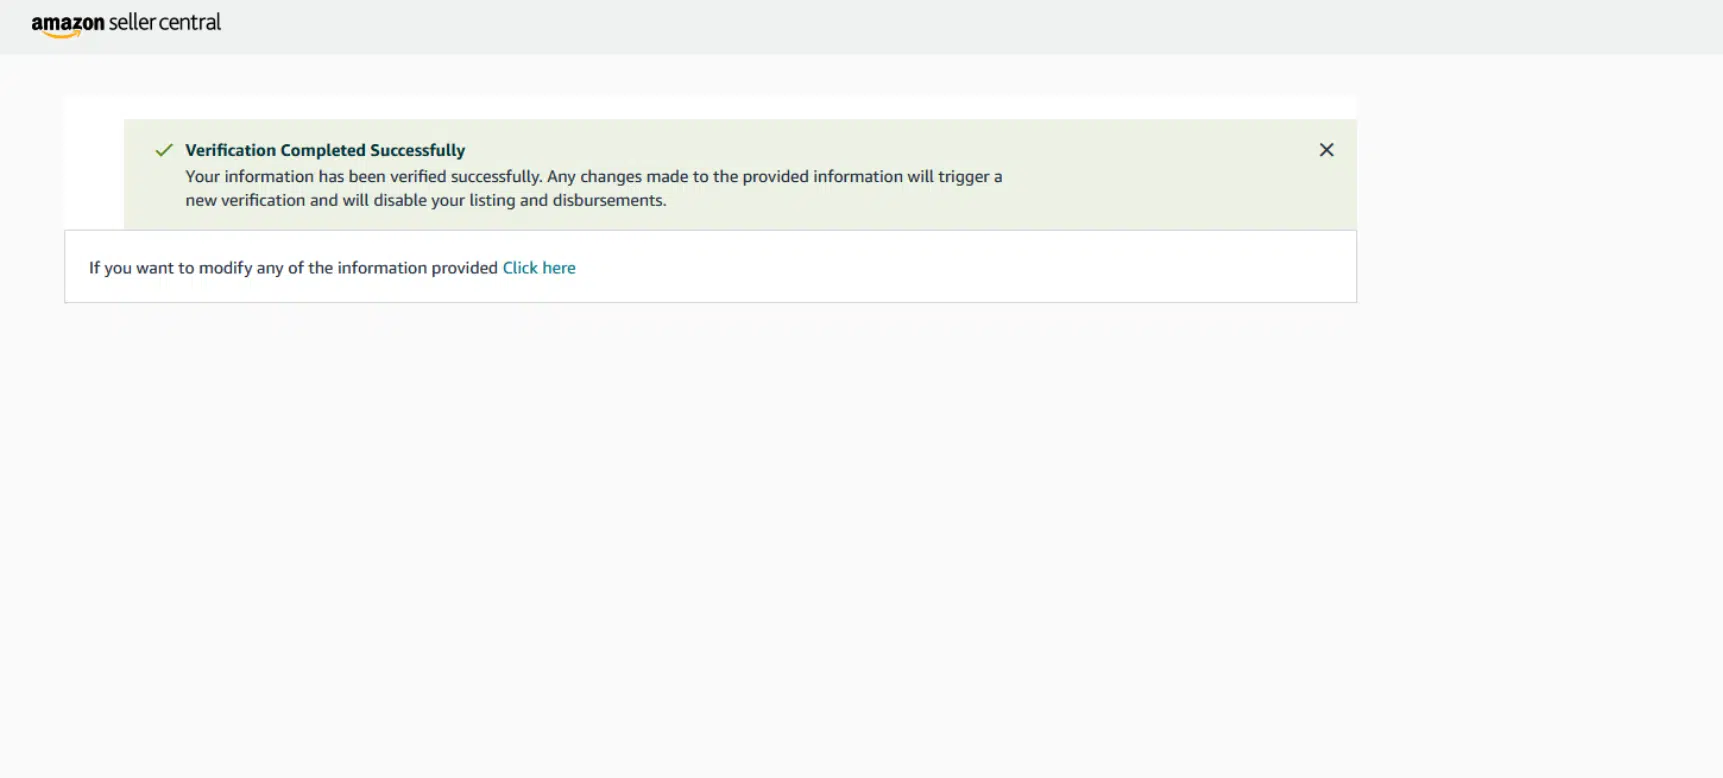
Verification completed
Once the details check out, Amazon confirms the verification is complete. Any later change to the verified information triggers a fresh review, so this only needs to be done once.
Seller Central · Verification complete
Open Manage Permissions
Back in Settings → User Permissions, Ben Karos now shows as Active under Current Users. Click Manage Permissions next to the name to open the full list of tools.
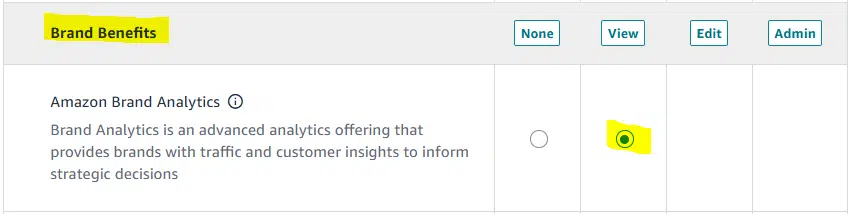
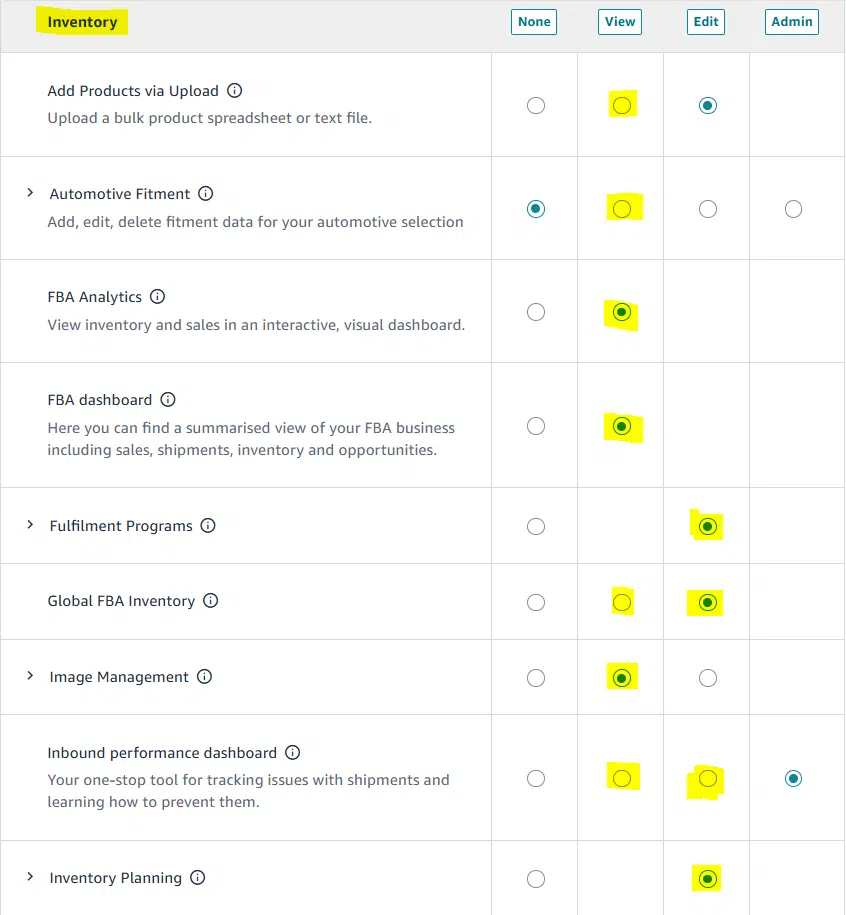
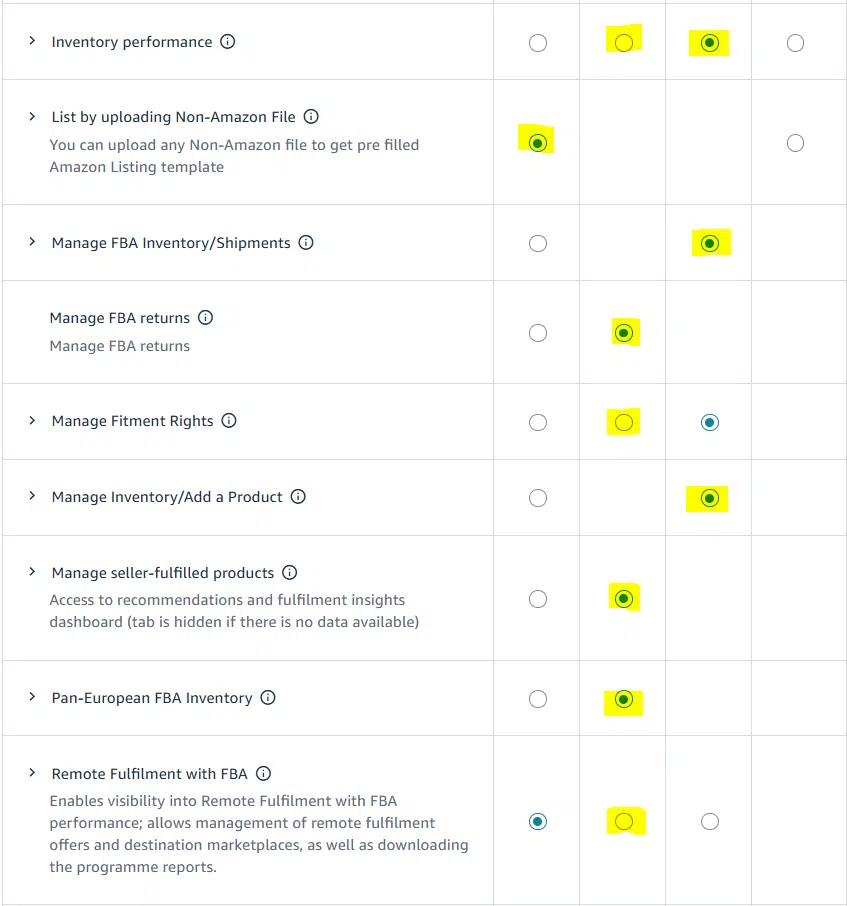
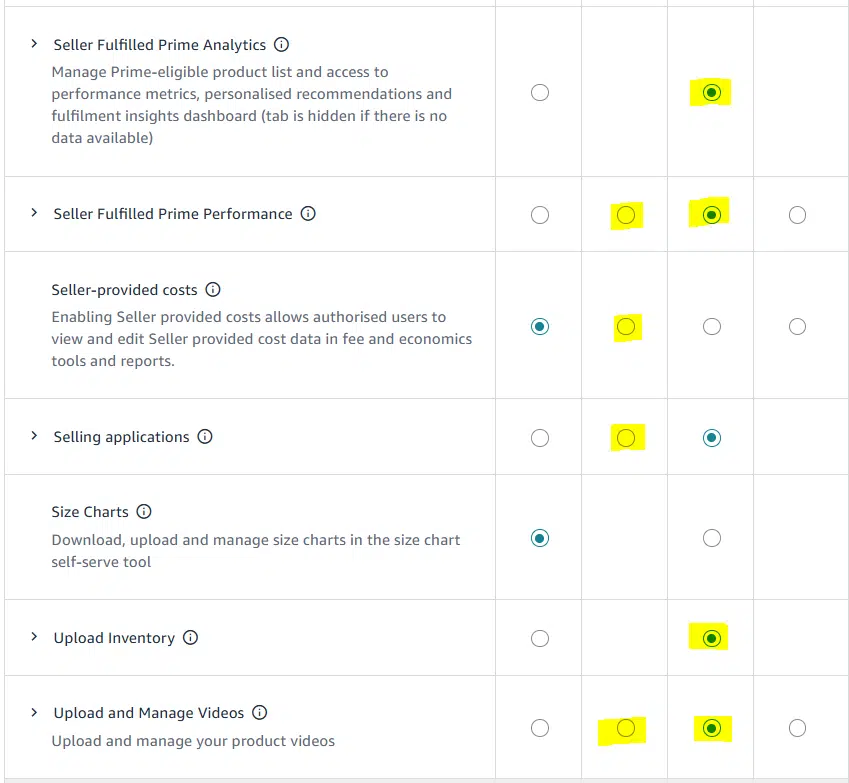
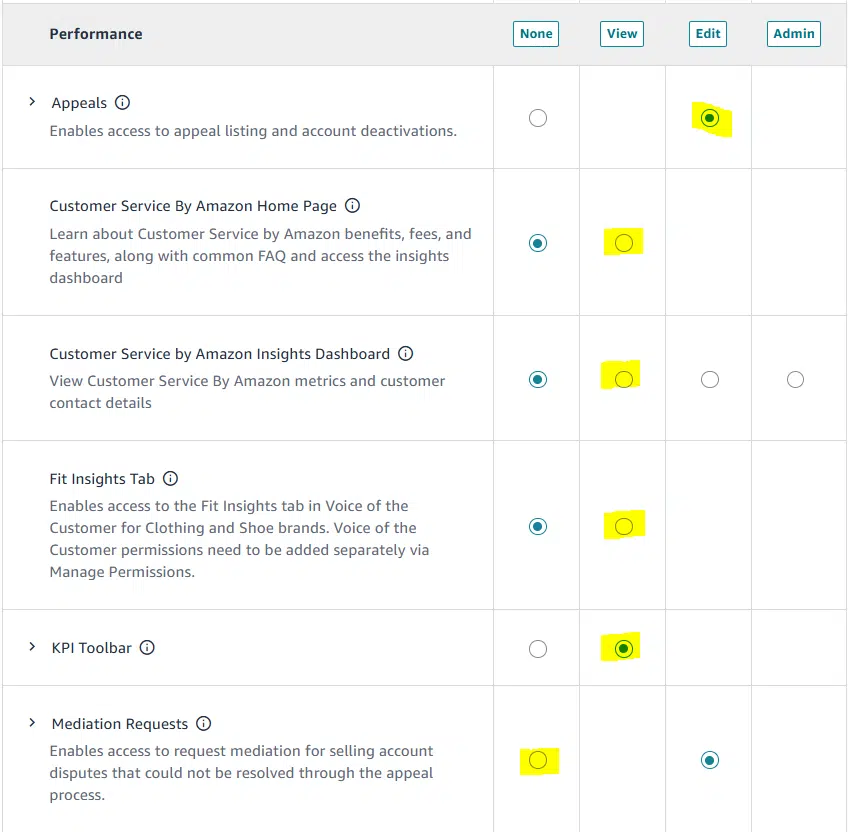
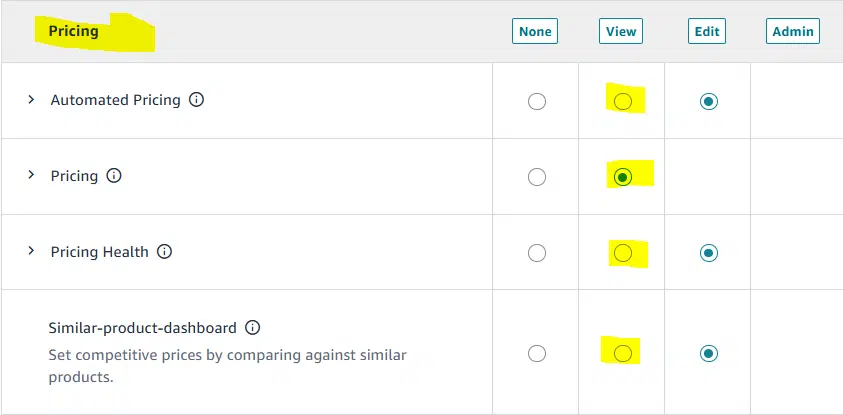
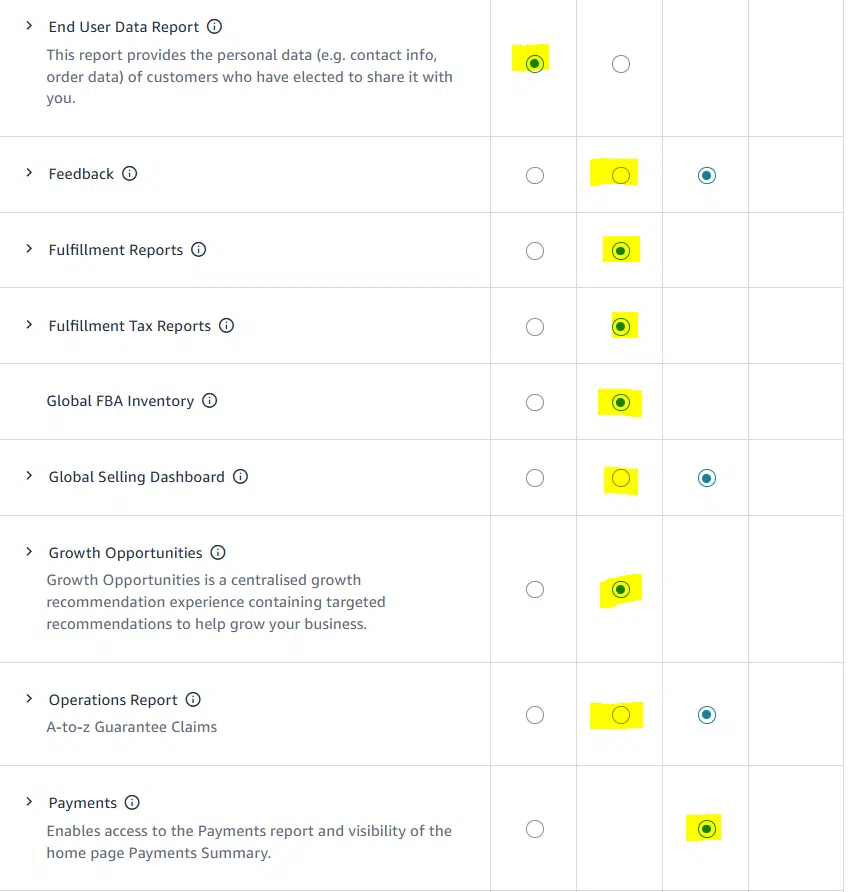
Set the access level for each tool
The permissions page lists every Seller Central tool grouped by section, each with four columns: None, View, Edit, and Admin. The screenshots below show the recommended setting for each section. Match the highlighted option in each one. Edit is what lets us actively manage that area; View gives read-only visibility.
Advertising

Brand Benefits
Inventory · 1 of 3
Inventory · 2 of 3
Inventory · 3 of 3
Performance
Pricing
Reports and Dashboards · 1 of 2
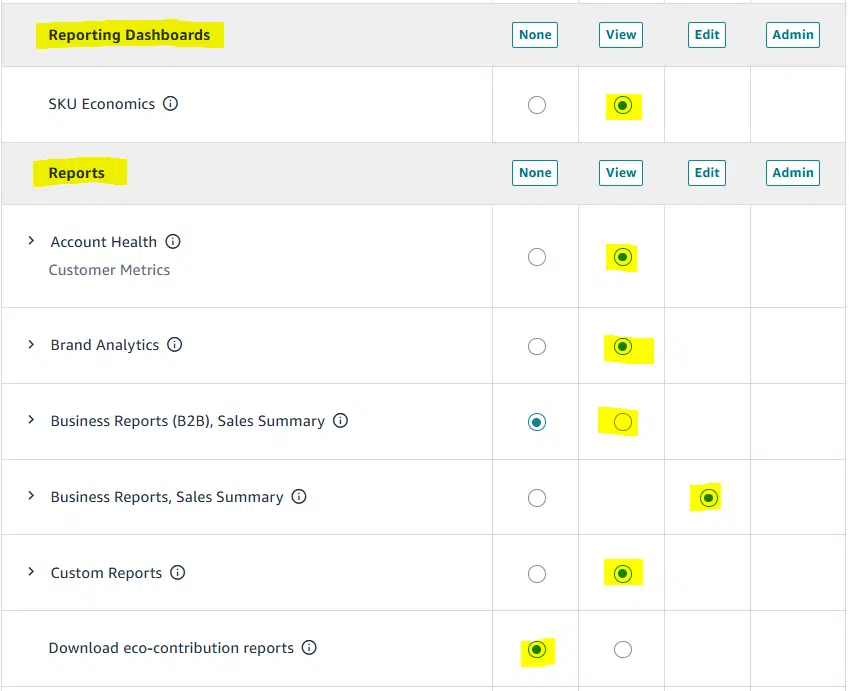
Reports and Dashboards · 2 of 2
Tip: click any screenshot to open it full size.
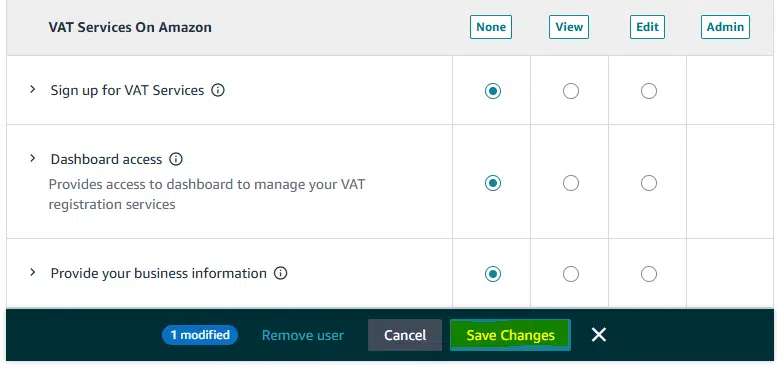
Save changes, then tell us
When every section is set, click Save Changes in the bar at the bottom of the page to apply the permissions. If your products sell in more than one marketplace, repeat the permission step for each marketplace.
Seller Central · Save changes
That is everything.
Send a quick note to hello@karoslabs.com once you have saved, and we will confirm access from our side. You remain the account owner, and you can change or remove these permissions at any time from Settings, then User Permissions.
Questions before you start?
Book a quick call and we will walk through it with you, screen by screen.
Book a callKaros Labs is an independent e-commerce operations agency. We are not affiliated with, endorsed by, or sponsored by any marketplace platform we work with. All product names, logos, and brands are the property of their respective owners and are referenced here only to help you set up access to your own account.